One great concern of volunteering to work on friends’ cars is the possibility of accidentally making things worse, and last month I very nearly did just that.
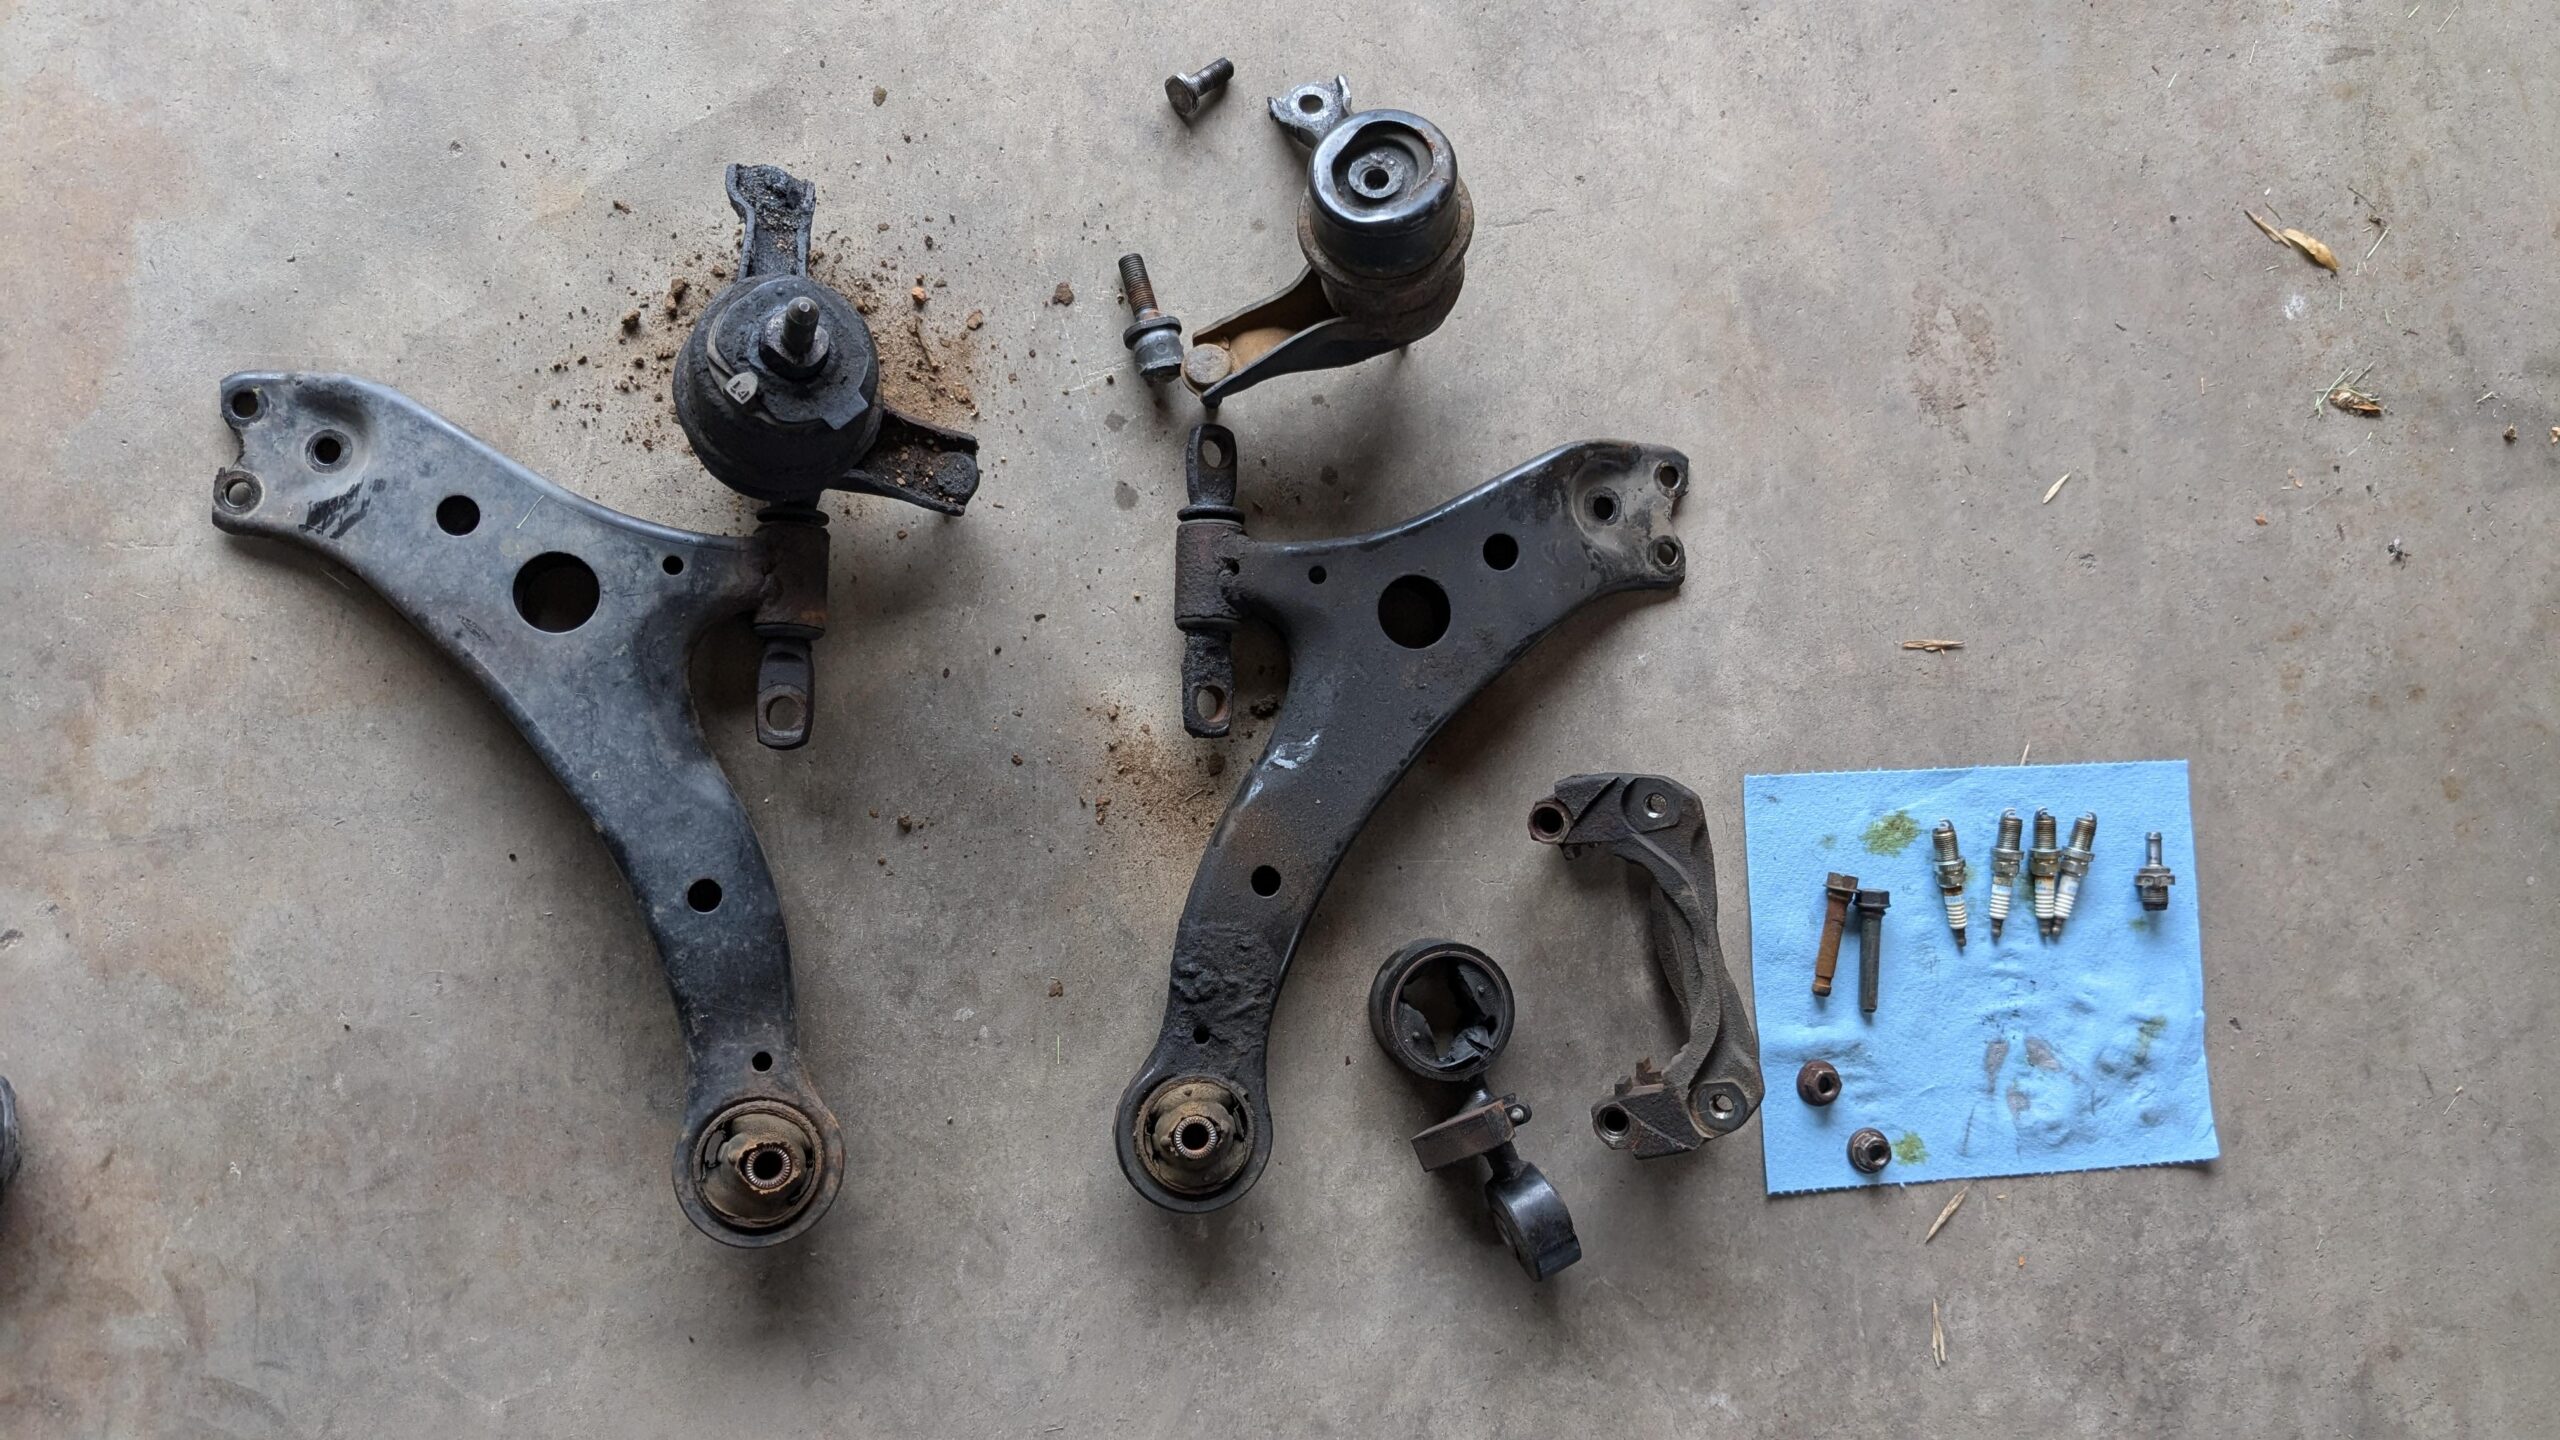
[The image above features the control arms (the big long pieces), the left and right engine mounts (in the opposite order), the “dogbone” mount, and the toasted caliper bracket. On the paper towel is the toasted caliper pin, spark plugs, PCV valve, and two of the (likely stretched) engine mount bolts. Not pictured are the PCV valve hose, the wiper fluid pump, and the rusty wheel stud]
A friend was gifted a used car late last year, which amazingly just happened to be the same make, model, and generation of car as mine, although a few years older. These are known for being great cars, but after taking a look at it, I could tell that it needed a decent amount of work. But sometimes God’s will kind of writes itself: what am I going to say? “Oh, hey, I know this car like the back of my hand, I’ve done a ton of work on it over the years, I’ve even changed these things specifically, and I have all week free because I’m living off of savings, but hey, good luck with it!” Yeah, right.
It started out with new struts all around, along with sway bar end links. I knew from experience that the end links, when they’re old and original, typically self-destruct when being removed, and that’s exactly what happened, so planning to replace them from the beginning was the right call. It was one long, tough Saturday finishing everything, but it worked out, and greatly improved the ride quality. Sadly, before new tires and an alignment could realistically be performed, the control arms also needed to be changed pretty badly, as one of the bushings was nearly cracked and rotted through. Eventually, plans were made for me to change these, as well. What follows is a walk-through of how things went, although if you’d like to skip the jargon, you can skip to the reflections at the end. You can reference the above picture, too.
Day 1, Saturday
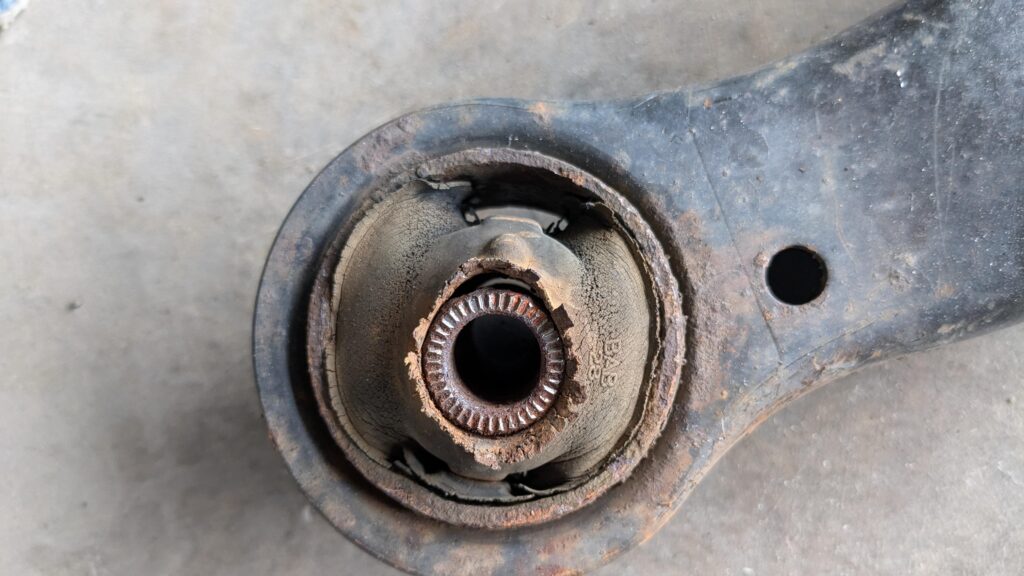
After putting the car up on jackstands and removing the wheels, I went to remove the 3 nuts under the transmission mount and something awful happened: after using the impact on the first nut, the whole thing began to spin freely. The stud coming down from the transmission mount had popped up from the mount bracket and refused to go back down. It’s in my picture but hard to see, so if you search online for “wheel stud” you will find something very similar, and the little splines are what hold it in place. This effectively meant I could not remove the mount at all, as the nut was thoroughly seized due to rust, and the stud was not designed to be held in place by anything other than those splines. A friend recommended using a prybar to apply upward pressure from under the stud to hold it in place. Since this all happened right beneath the driver’s side axle, I wrapped the axle boot in an old towel to make sure it wouldn’t get punctured by a flying prybar, then applied pressure underneath the stud top using the prybar while using a ratchet and socket below. It actually did make some progress, but not much before it once again began to spin, the pressure not being enough to hold things in place. Parts changed: 0. Parts worsened: 1. With no options left, I bolted everything else back together, hoping this would be acceptable – if not slightly vibrational – and sent my friend on his way. A shop would need to deal with it, sadly. Changing the control arm on the other side was still very much an option, but it was too late in the day to refocus on that, so the car would need to come back another day.
Day 2, the next Saturday
Determined to save my friend some money at least, I turned my attention to the control arm on the passenger side. This time, aware of how rust had affected the transmission mount bolts, I used hand tools instead of my impact, and was able to remove the engine mount and the old control arm. It was tough, though. Then, when I went to put the new control arm in, I couldn’t get it to bolt down in the front. To my horror, it seemed that something might have been stripped inside the subframe, although the two giant bolts were missing the first course or two of threads, leading me to think that they might have been the problem, so I planned to buy them from a dealership that Monday, and dropped my friend off back at his place. The car would need to stay with me for at least a day or two. Things were not looking good.
Day 3, Sunday
I can’t remember the precise timeline, some of this may have been Saturday night when I got back home, but I took one more crack at it before waiting until Monday to buy those two bolts from the dealership. I found a YouTube video describing how aftermarket control arms sometimes have tighter clearances than they should, so you may have to wrestle it a bit, and you can stick a beefy screwdriver in one of the holes and pry that tiny bit of extra clearance until everything lines up more precisely. And holy shit, it actually worked. I got the new control arm in, installed the new engine mount (which I bought to be safe, since the originals were ancient), and got everything bolted up and tidy. One side down. Money saved!
(Also, get yourself a heavy duty tap and die kit, those things are amazing: having the right die on hand helped me clean those bolts up really nicely)
Day 4, Monday
It was clear that the car was going to stay with me for a few more days, and my friend had other ways of getting to and from work, so I decided to try a few more things to get the driver’s side transmission mount free. As per a friend’s suggestion, I went out and bought a bigger prybar (there’s always a bigger prybar), and it showed promise, but couldn’t quite do the job. I think it was a physics thing – imagine holding a pen between two fingers as a representation for how the stud/nut combo was being held, with the subframe being somewhat analogous to your fingers. No amount of upward pressure could deal with the ease of its rotation, so the bite was never strong enough compared to the required twisting force to get the nut free.
Halfway through the day, I tried a Hail Mary by getting under the car with my Dremel cutting wheel to see if I could shave the sides of the stud into a bolt. I felt like an idiot, but with the cutting wheel shield facing up toward the axle – so I couldn’t accidentally make things exponentially worse – I slowly cut away at two opposite sides of the stud top, and got things decently parallel. Amazingly, it worked, and I was able to get a 22mm wrench onto it. This rested nicely against the steering rack, and I was able to crank the ratchet from underneath, and my goodness did that take a lot of cranking. That was some of the hardest cranking I’ve ever done, but after many re-adjustments and fallen wrenches, taking things as slow as needed to not fuck things up, the nut actually came free, and I promptly went about telling everybody because I simply couldn’t believe it.
Day 5, Tuesday
I was so happy to get the old mount out, I waited until Tuesday to tackle the control arm. It came out just fine, and the new one went in even easier. Beautiful. By end of day Tuesday, all the suspension work was done, although the old transmission mount nuts were so toasted that I had to order new ones from the dealership, using some smaller nuts as a temporary measure. However…I had noticed while everything was up in the air, that one caliper had some flex to it while the other didn’t. I believe I waited until Wednesday to look into this further.
Day 6, Wednesday
It turns out that flex from the caliper is normal, so I inspected the side with no flex, and found a cracked pin boot. When I took the bracket off, the pin was seized inside, and when I twisted it back and forth and pulled it out, it eventually came free, belching a small pile of rust with it. Whoa. It’s great to find these sorts of issues before they become real safety hazards, but it means running all over town trying to buy parts. I went to a dealership, where I bought spark plugs (another item my friend had considered changing), but otherwise it was like the Monty Python cheese shop skit, except with parts (“Do you have any parts at all?” “Uh, no, sir”). I bought some aftermarket pins and pin boots elsewhere, and returned home. Even with new pins and proper grease, though, the inside of the bracket was so badly rusted that the bottom pin still wanted to seize, so I realized it needed a new caliper bracket entirely. I ordered a re-manufactured one from another nearby parts store, ETA noon the next day.
Pleased otherwise to be done with all of the suspension work, I realized I had plenty of time to take care of some other things I had considered doing, such as cleaning the MAF sensor and throttle body. Moreover, throughout the suspension work, the cheap-ass, no-name oil filter had continued staring at me from the undercarriage, so I had resolved that it needed to be replaced with something respectable, and gave the car an oil change along with a new OEM oil filter. (insert Judgemental Volturi meme)
Day 7-9, Thursday through Saturday
These days were only partly spent working on the car. I had to pick up the caliper bracket, install that along with the new pins and boots, cleaned the MAF sensor and throttle body, changed the PCV valve because lord knows it probably needed it, and mostly just did some small things to tune it up. Installed those new mount bolts once they arrived at the dealership, etc. I did notice the brakes were weak, and although I pulled some air out of the brake lines, I’m very uncomfortable working with brake fluid and didn’t do too much. I was able to diagnose a failed wiper fluid pump (not rocket science to diagnose, but I’d never touched any of that before), and was able to get the car back to my friend with a strict warning to get new tires ASAP (metal threads were coming through on the front), as well as maybe get the brakes checked sooner than later.
Reflections and Lessons Learned
Things looked very bad at the beginning, but amazingly, everything worked out. It really made all the pain and suffering worth it. I don’t know how to describe it, it’s just a great feeling when things work out. My friend later got new tires, got the brakes fixed, and now it sounds like it’s doing great. I discovered that seized caliper pin and got that fixed, which is really critical, and did a bunch of preventative maintenance that should help it last. Honestly, I think things would have gone better if I had simply planned to keep the car at my place for a few days; the fact that the car ended up needing to stay at my place simply made doing all the extra work I had kind of wanted to do all the more feasible. At the beginning, too, I was able to fix the air box, because some jackass in the past had lost both bolts and jammed a carpenter’s screw through the back plastic to hold it in place. I was able to buy the missing nut and two bolts to make sure it was secured properly. Best $3 I ever spent. (Those lazy sons of bi****….)
One of the best parts about doing the work on your car is calculating how much money you saved. How much money did I save my friend?
This has actually been really hard to calculate. Online car repair estimates sometimes give wildly inaccurate numbers, and while you can find real-world examples on Reddit, you have to watch out for yahoos who are like, “Durr, I paid $200 for all 4 struts and changed them all in one hour without a single problem, shouldn’t cost you more than $200, stealership’s trying to rip you off asking $600, durrrrrrr”. (Many people fail to realize that shops are expensive to run, and a lot of mechanics are actually telling you the truth when they say something needs to be addressed.) The other problem is that with those control arms, the official book estimate is almost 12 hours, because the official procedure has you remove the engine and transmission. In practice, nobody in their right mind actually does this, but shops are perfectly within their rights to charge you the full book time. The estimates will (rightly) be between $1,600 and $2,400 for the job, but an independent shop might charge about $700, which is more accurate to the actual effort (you can jack up each side independently to slip the mounts out, although it is kind of tricky and requires good spatial reasoning).
Fortunately, I found some real-world service agreements for these jobs online, and although prices might vary regionally, they seemed accurate (with some rounding). Here’s how those apply to what I did:
- 4x quick strut assemblies, with sway bar end links: total shop cost $1700; DIY parts ~$800, total savings $900
- 2x front lower control arms: total shop cost $700; DIY parts $100, savings $600 (not counting the new engine mounts)
- 4x spark plugs: total shop estimate $200; DIY parts $50, savings $150 (not bad for 20 minutes of work!) (also, I don’t want to hear about your shitty $4 ebay plugs, I bought these from the dealership for quality and expediency, and they will probably last the remaining life of the car)
Everything beyond these becomes hard to estimate. One estimate puts the PCV valve at $500, which is ridiculous, and is probably being taken from the 6 cylinder model where tons of extra crap has to be removed first, or something like that. It’s an $8 part, with a $20 hose, right at the back top of the engine, there’s no way it costs that much. It took me half an hour, and it only took so long because the hose put up such a fight (and then split…). There are no estimates for a caliper bracket, slide pins, or slide pin dust covers, but based on the markup of parts and maybe an hour of labor, all that might have saved around $200. The oil change saved maybe $50, but it depends on how ‘budget’ you go (if you do it yourself, it’s like $40 for full synthetic oil and an OEM filter). I replaced all of the lug nuts because they were all ancient and soft and not good, as well as one lug stud because it was hard to spin the lug nut on, so fuck it. (Lisle wheel stud installer: one of the best $25 I’ve ever spent, in-garage for 6 or 7 years now)
All of this combined might have saved between $2,000 and $2,500. Pretty good haul!
The more I thought about it, though, it all depends on context. If you go to a mechanic and they quote you the full book time for those control arms, you might have no way of knowing it should only cost $700, and not $2,000. If you go to a mechanic for new struts, they might only change the struts, but not the whole assembly, including the bump stops and coil springs, so you might end up back at the shop needing those as well, when it could have all been fixed at once. Gravy jobs like spark plugs pay well for the effort involved, but those gravy jobs help make up for the nightmares that inevitably roll in, and the occasional Karen who insists on a transmission flush, but who then tries to sue you because you did what she told you to do and it ruined her transmission [I absolutely shit you not, a very long time ago I was at a shop and the service writer was dealing with a dad who accused them of taking advantage of his daughter when she very explicitly insisted on getting a transmission flush]. Shady mechanics do absolutely exist, but even the good ones fight an uphill battle, because nobody really enjoys paying money to fix their car.
So…did doing the control arms save my friend $600, or $2,000?
In some ways, using your skills to help others is not even so much about the money saved as it is about adding reliable context and understanding to a situation. Changing the control arms technically only saved $600, but it’s entirely possible that adding context saved the extra $1400, right? If my friend had gone to a shop that quoted him full book time, he might never have known it didn’t need to cost $2,000. Saving money helps, but sometimes people just need to know what matters most, and especially in the context of cars, people need to know whether an estimate is fair or not. In this case, that context also and more importantly involved, “What needs to happen to this car to make it safe and reliable?” There’s a lot that goes into addressing that question!
I’m not ASE certified, and there are many things I can’t do on a car, but as perhaps a slightly above-average “garage mechanic” who goes to great lengths to do things right, and torques to spec whenever possible, I know a fair bit about suspension and changing suspension parts, and suspension work is specifically what this car needed the most. I know a few other things, too, and that helped to tune it up and fix that caliper bracket, but as for the soft brakes, that had to go to the pros (who found out there was still some air in the lines, and that the rear drum brakes needed to be adjusted to work more effectively, something I never even considered). Fortunately, I was able to get in there, change some of the more obvious things that needed to be changed, fix up a bunch of little stuff, and be able to weigh in on next items to take care of. Feels good to be of help!