I’ve done a lot of work on my car this past year. From a functional perspective, much of this hasn’t been necessary, but from a maintenance perspective, it has been great. I’ve learned a lot this year and have actually had quite a bit of fun, and wanted to share some of my stories.
Hub Grappler
January kicked off with a massive punch to the gut: I discovered that my transmission is leaking. And not in the normal ways. You might expect the pan gasket to leak over time, or the seals to leak where the cv axles connect, but you wouldn’t expect the factory-set gasket going through the middle of the case to leak. Oh, but it is.
Mind you, it’s not leaking very much. Maybe a drop every day or two. One year later, the fluid level still seems to be fine, though I want to keep my eye on it. But when I discovered this, it was at a time I was hoping to change the control arm and ball joint on the passenger side of the vehicle to complement the driver’s side, which I completed in 2020.
I’ll keep this brief, but the old poverty spirit really rose up inside of me and fear took hold. I wanted to get my big control arm/ ball joint project done and over with so I could focus my worries on the transmission, I guess. As part of this, I decided I should try to change the wheel bearing while I was at it so as to “be done” with that side of the car and really not need to get in there again (what axle? what tie rod? what strut?). Although I still owned my shop press at that time, I knew it could be tricky to use, and pressing hubs out is awkward and dangerous. So, compelled by a mixture of fear and reason, I decided to go big or go home, and bought the excellent OTC Hub Grappler for $480, by far the most expensive and overkill DIY tool I have ever bought [to be fair, though, a quick Amazon search tells me it is currently selling for over $600!]. It is also, however, the most bad ass tool I own, and owning it gave me the confidence to ditch my annoying shop press.
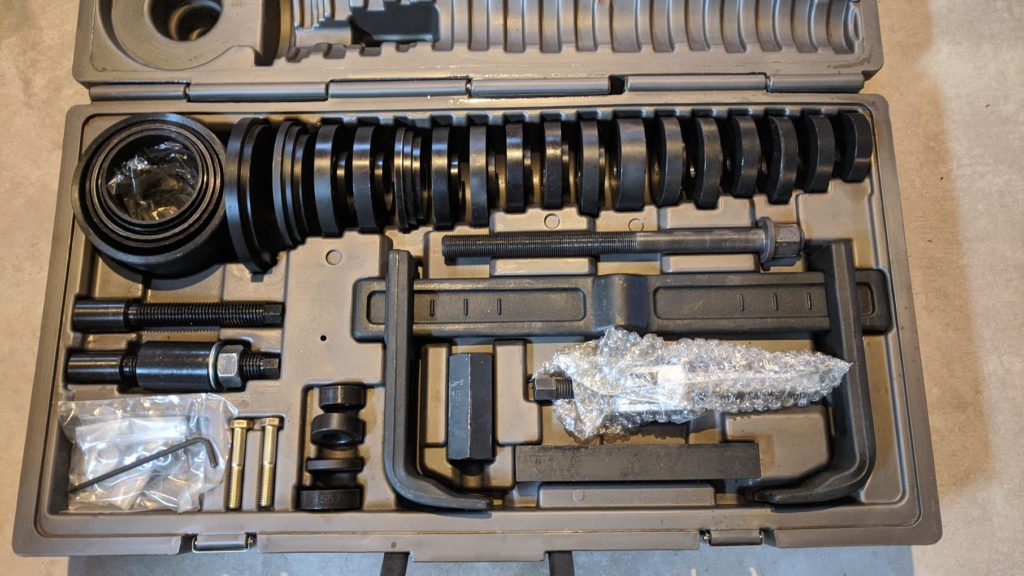
In preparation for changing the bearing, I bought a $60 junkyard knuckle assembly so I could make sure I knew how to use the tool properly, and did successfully press out the old bearing and press in a cheap new $20 bearing. So…good deal?
I will return to the story of the Hub Grappler later in this post.
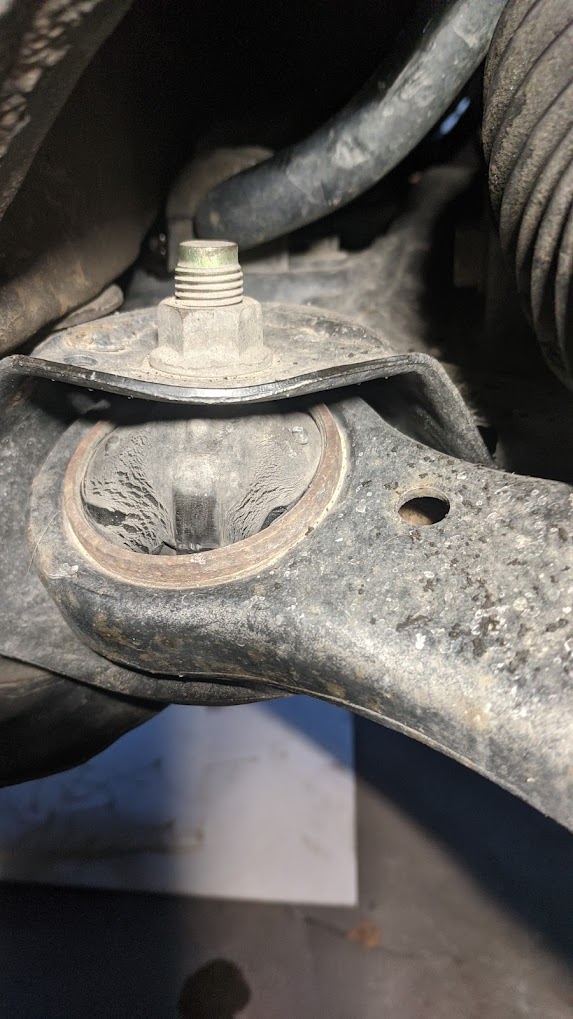
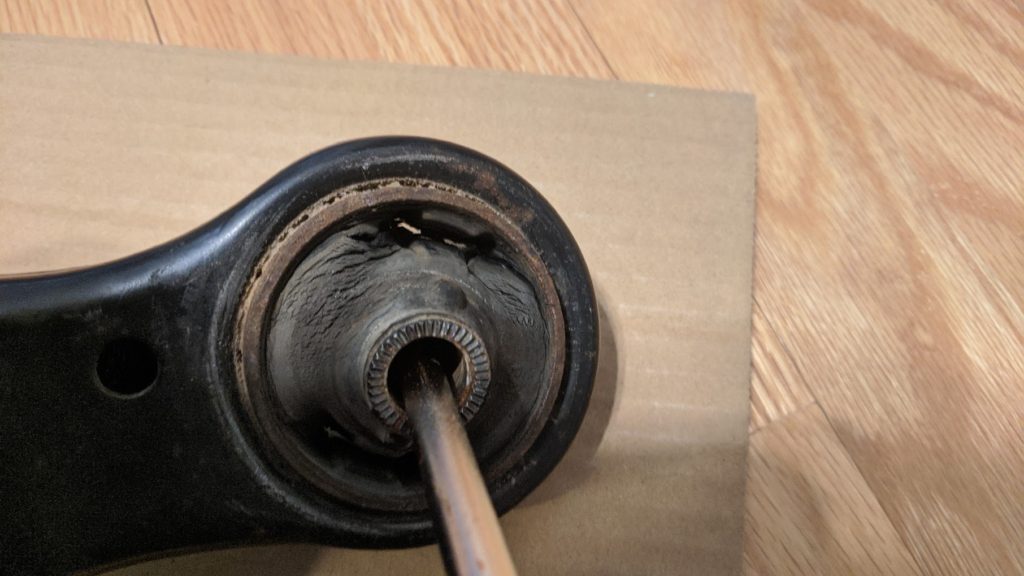
Control Arm/ Ball Joint/ Engine Mount
The control arm, ball joint, and engine mount project did turn out, but funny enough, I was so tired from that that I decided to forgo changing the bearing with it. You read that correctly: I spent $480 on a tool and ended up not using it (for nearly a year!). Mistakes were made.
Nonetheless, I finished what I had originally set out to finish. A note to fellow DIYers, though: always double-check the torque you apply to bolts. I could have sworn I had torqued the ball joint down to 91 foot pounds, nay, 92 foot pounds for good measure, but it wasn’t permanently sealed in my memory, and afterward I was left with a slight amount of doubt. That’s not a situation you want to find yourself in. The castle nut never backed off, and the cotter pin never suffered any sideways pressure, so I decided my vague memory must be correct. It wasn’t until I did actually change the bearing a few weeks ago that I was able to 100% confirm that I had indeed tightened the nut down to spec. Don’t live with that uncertainty: always double-check your toque.
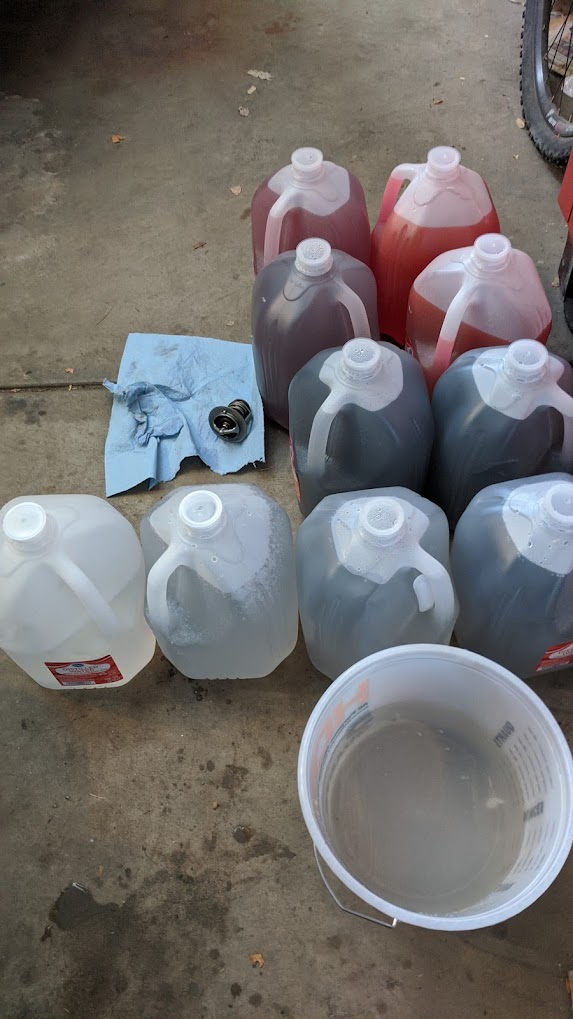
Coolant Super Flush
My coolant was super murky for awhile. I had no reason to believe the headgasket was leaking or anything like that, but it didn’t look good. So I found Chris Fix’s coolant “Super Flush” video on YouTube and set about following a similar process. I decided to replace the thermostat while I was at it, making sure to also order a new thermostat gasket, and decided to replace the upper and lower radiator hoses, too. In retrospect, it might have been nice to change the other 4 hoses, too (two for the throttle body, two for the heater core), but I’m not too concerned about those. The point is, my cooling system is way cleaner now.
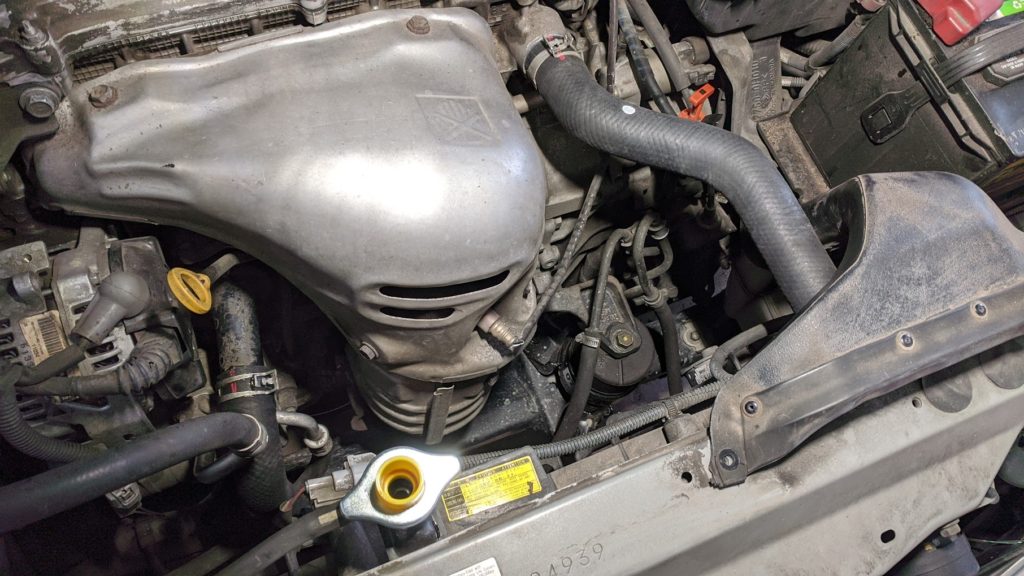
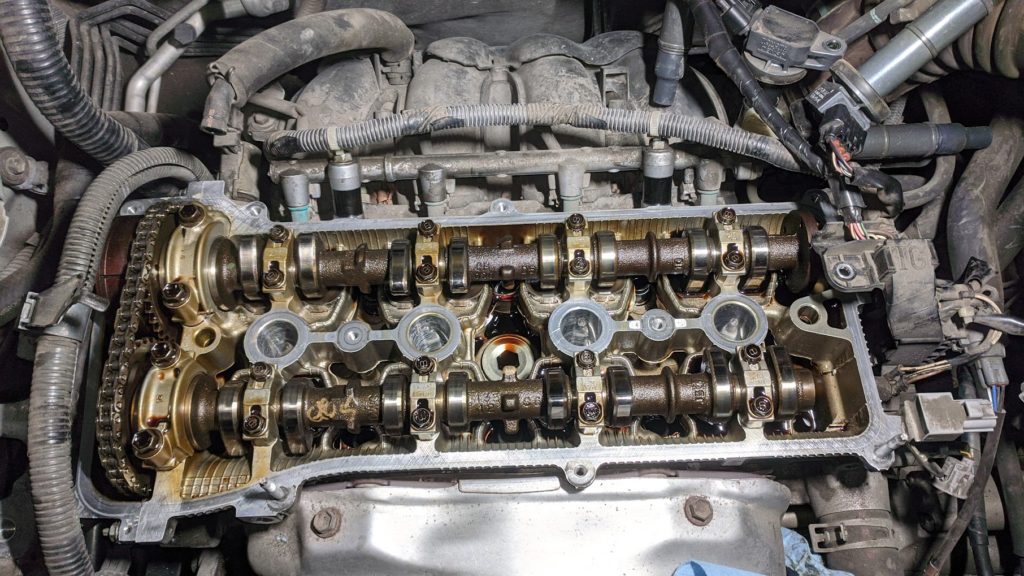
Valve Cover Gasket
Oh, but the fun didn’t stop there. My valve cover gasket was starting to seep, so I decided to change it. This was actually one of the harder things I did this year, since there’s a lot of plastic crap obstructing the valve cover itself, but I did manage to pull it off. The gasket broke apart into chunks. CHUNKS. That’s when you really know it was bad. I had to be really careful not to let any of those chunks fall into the cylinder head.
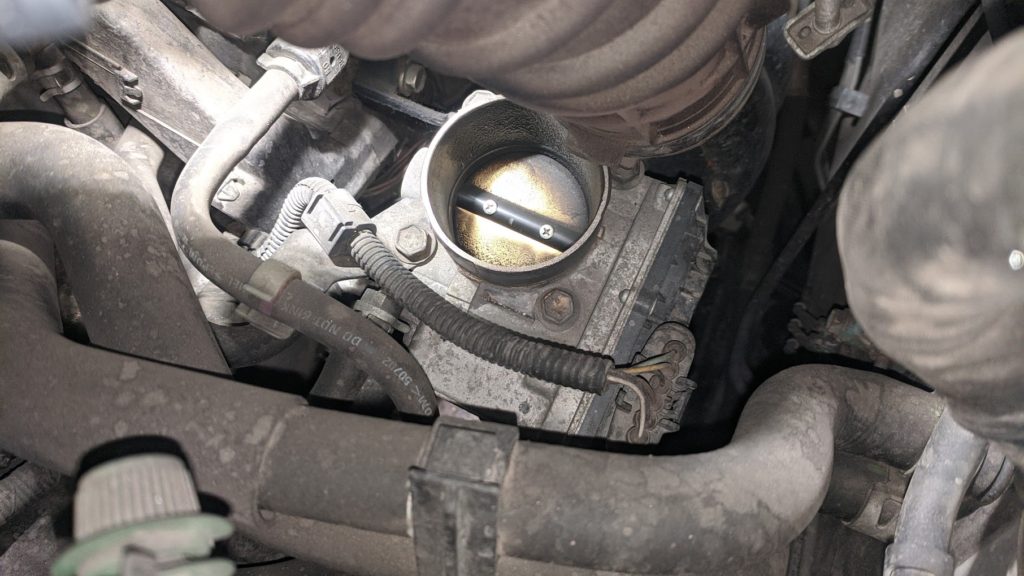
Throttle Body and Mass Airflow Sensor Cleaning
I had never cleaned a throttle body before, so I decided to do that as well as clean the mass airflow sensor over the summer. It was a good thing to do this, I think, as they were both pretty dirty. I’m not sure whether CRC mass airflow sensor cleaner or throttle body cleaner is really anything special – there’s some speculation that they’re little more than rebranded brake cleaner – but whatever, it did the job.
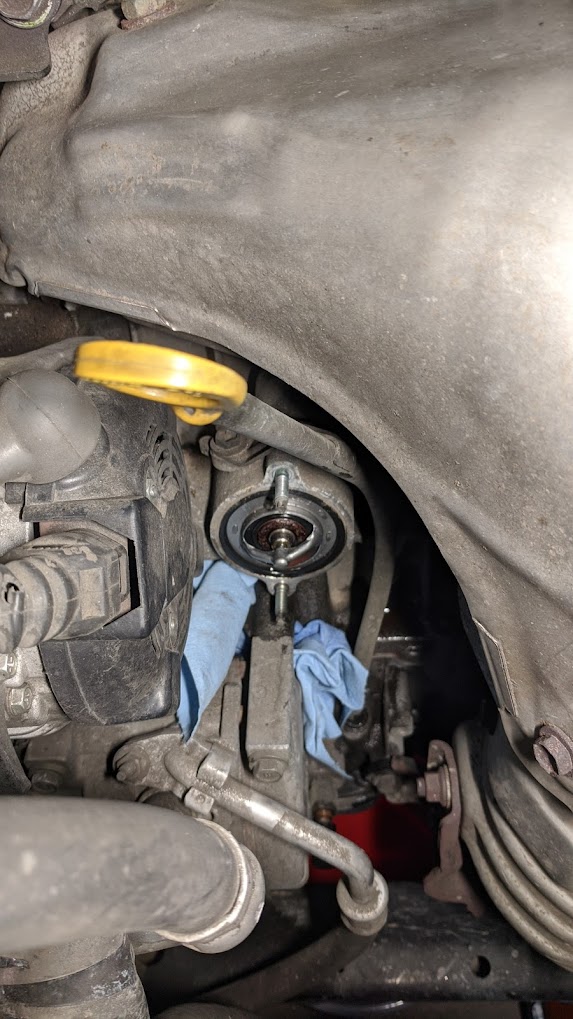
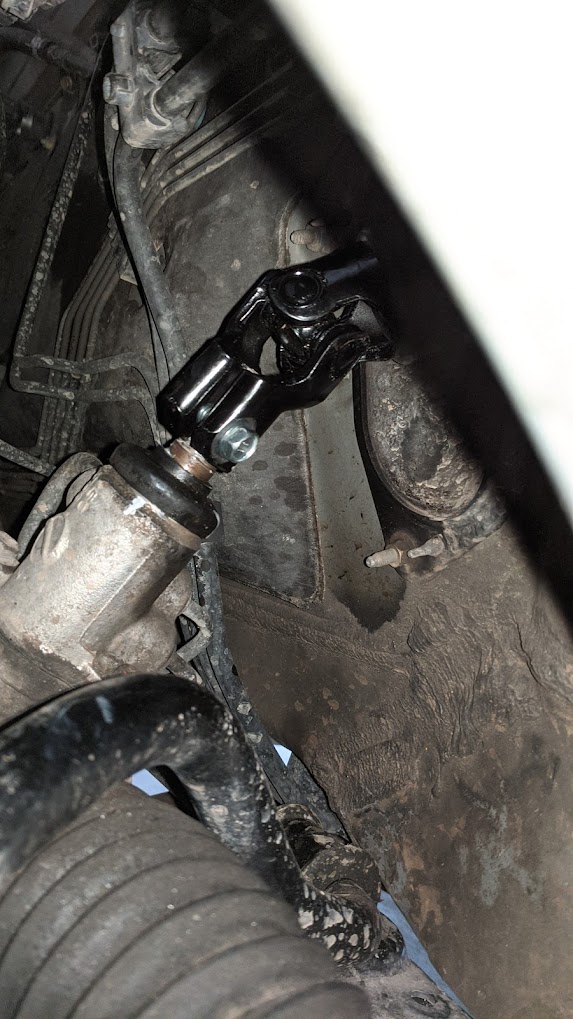
Steering Intermediate Shaft
When I first bought my car, it kept making these light clunking noises from the steering shaft. Drove me nuts. I was worried that it might be a safety issue, but after doing some research, I learned that this was a common issue and had its own technical bulletin: it wasn’t in itself a safety concern. But it always bothered me: what happens if the shaft actually goes bad? Surely it has to at some point in time. What if that time was now? There had been a fix where you pour some grease into the joint at a certain place, but I started not to trust this when I saw some wear marks on the sides of the joint that looked abnormal. I bought a new shaft directly from Toyota, which wasn’t cheap ($200+?), changed it, and was absolutely amazed when all of those sounds immediately went away. The part was a new design for the original, so those sounds should never be a problem again. And if they are, it means the shaft is actually going bad.
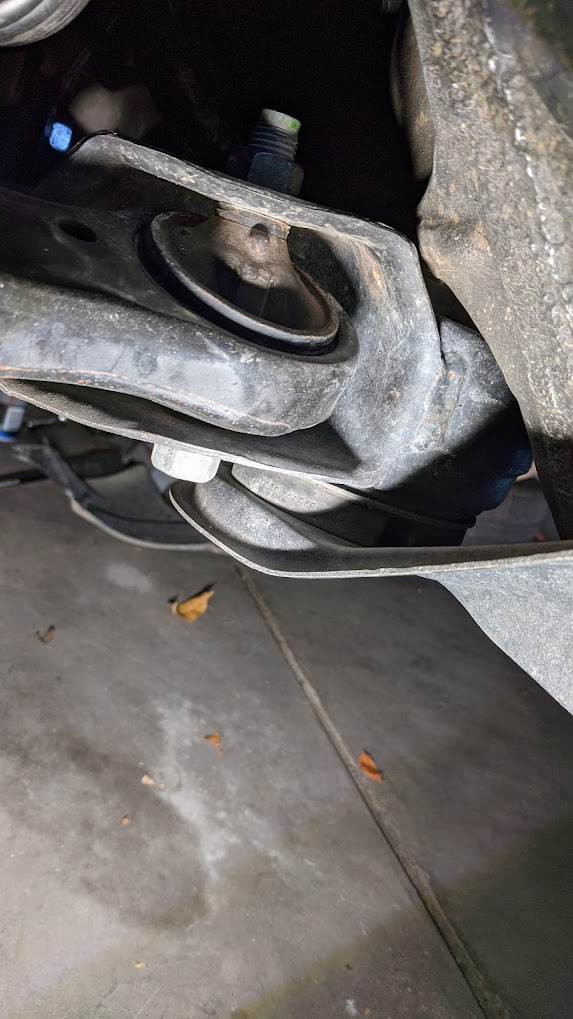
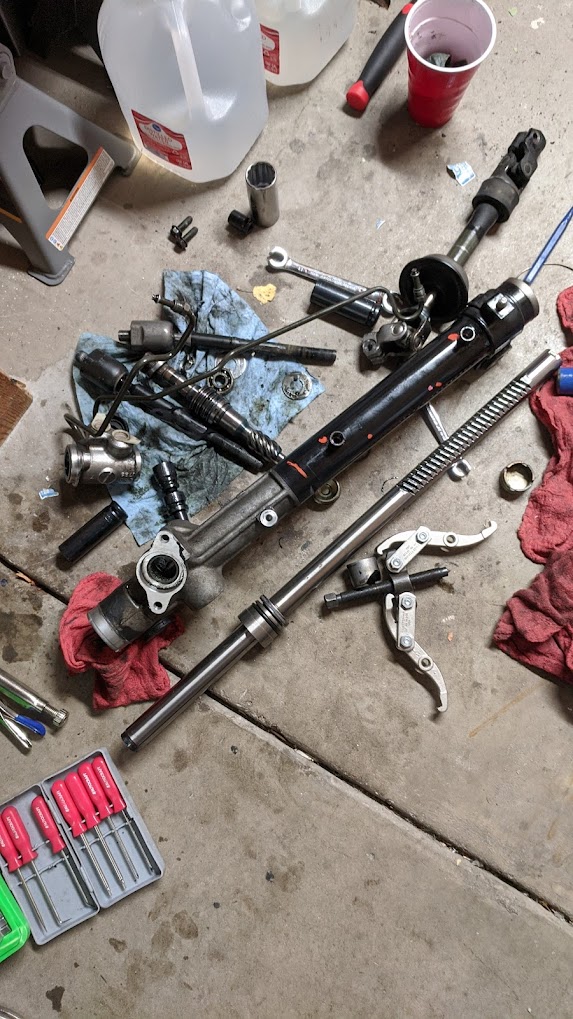
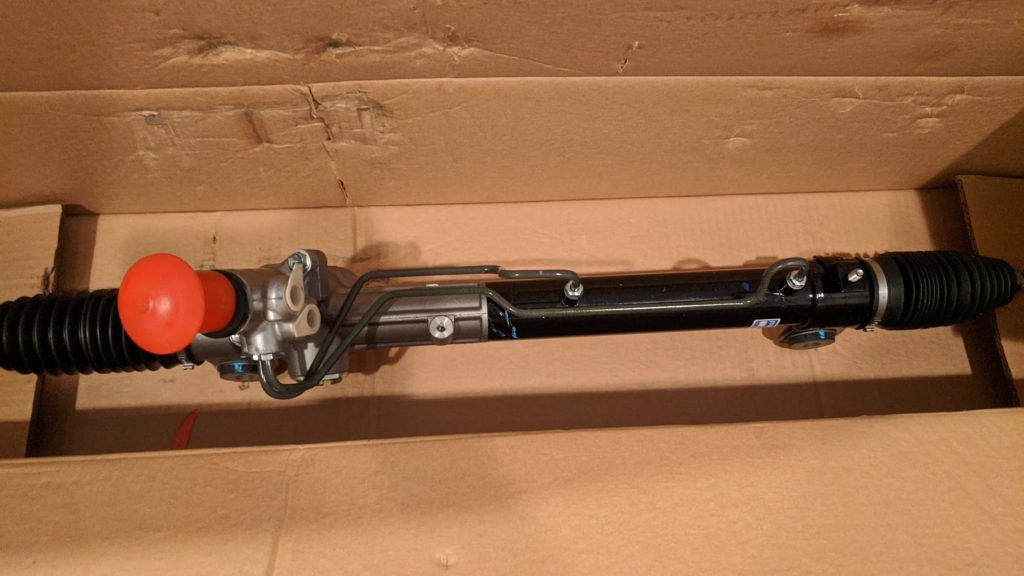
Power Steering Rack
It was a good thing I learned how to change the steering intermediate shaft, as this would be just one of several steps that would be necessary during my next project.
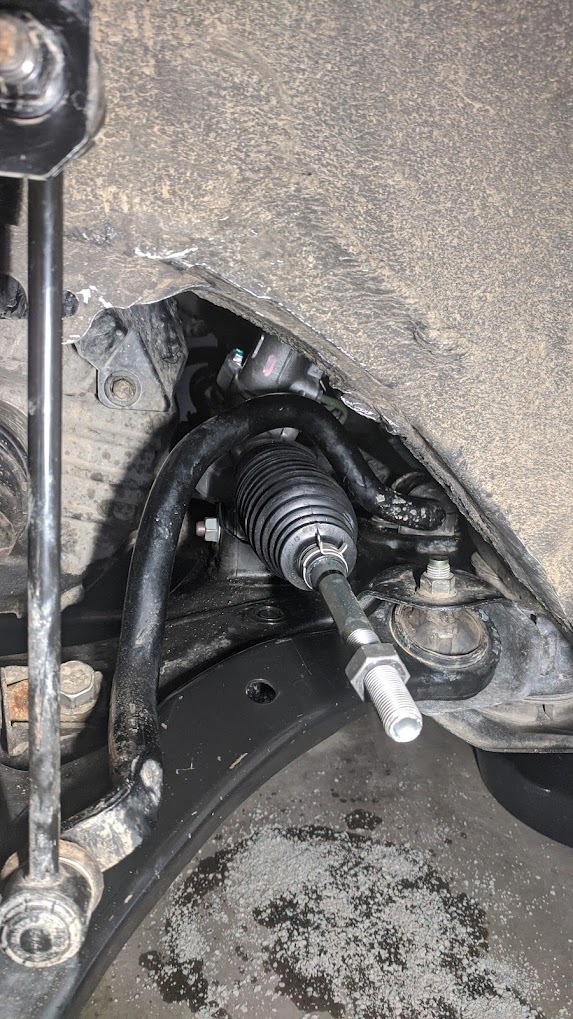
You know how I mentioned that I wanted to change the wheel bearings so I wouldn’t have to get into that area again? Yeah, that was a cute idea. I started getting some clunks over bumps, which made no sense, because the outer tie rods were only a few years old, the ball joints were brand new, the bushings were brand new, and the sway bar end links were brand new. What gives? So I decided to change the inner tie rods, as I could only imagine those were as old as the car itself, and they were one of the few things I hadn’t changed yet. What can I say, I’m a glutton for punishment. Anyway, when I pulled off the inner tie rod boot on the driver’s side, fluid came pouring out. I thought this was just aged, liquefied grease, but after cleaning out the area with some blasts of brake cleaner, I stepped away for 15 minutes and came back to find a pool of fluid in the rack once more. This fluid was power steering fluid, which meant that the seals inside the rack were toast.
Some people might just keep an eye on their fluid level and not worry about it. But this can technically contaminate the grease inside the inner tie rods. It also puts your car in a vulnerable position, where if one of the inner tie rod boots cracks, it could potentially drain much of your power steering fluid over a day or two.
I said to hell with that. I ordered a brand new rack from Toyota. It was expensive – some $650 – but I think it was worth it just to know that this will probably last another 10-15 years without issue. It was a big project, but I was really proud of myself for pulling it off. Again, you could save money by foregoing this, or buying an aftermarket rebuilt unit, but my priorities aren’t always cost savings: I value reliability more. Or, as Mr. White says in Casino Royale: “Money isn’t as valuable to our organization as knowing [what] to trust”.
Junkyard Alternator
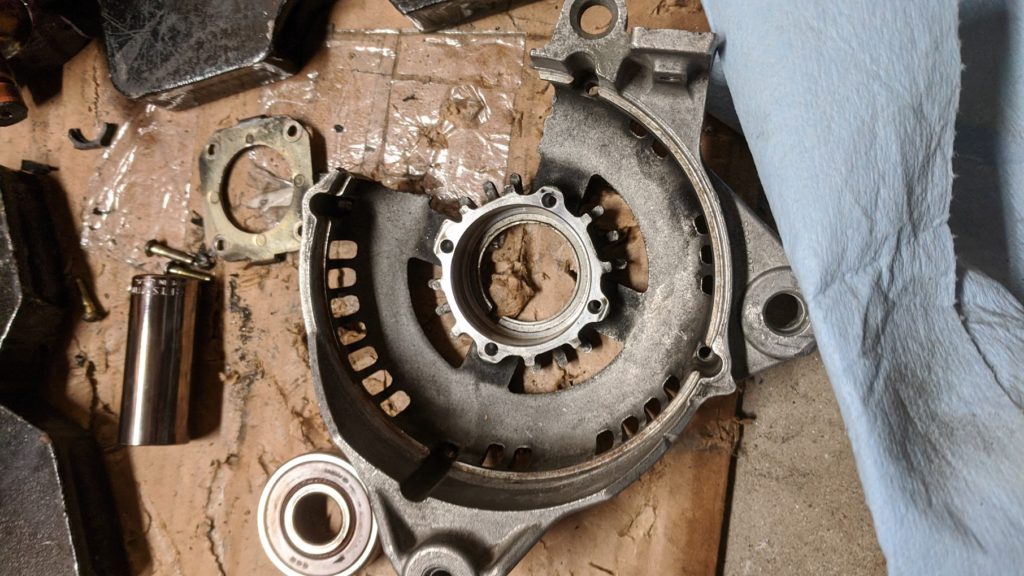
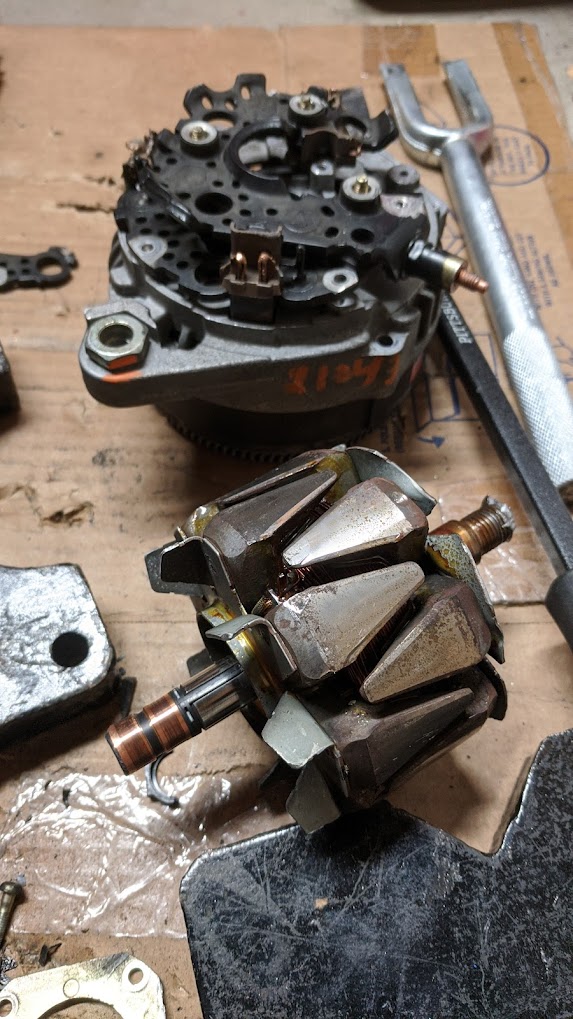
As far as I’m aware, my alternator is fine. But I wanted to find out how hard it might be to rebuild it, so I bought a junkyard alternator of the same model. It seemed to be in great condition, but I’ll never know if it was or not: I had to absolutely destroy it to take take it apart.
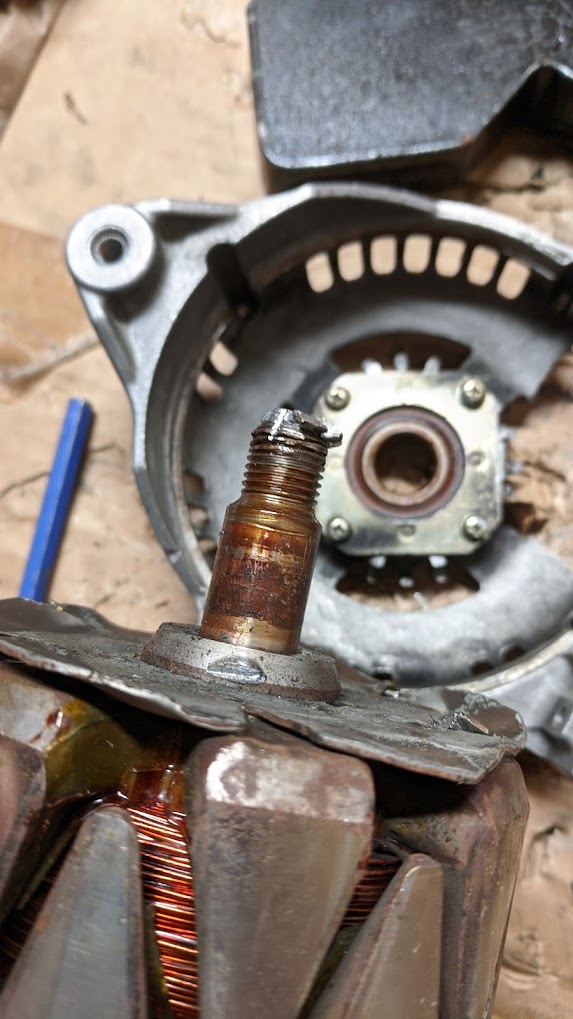
The factory service manual shows 4 or 5 “special service tools” being used to change everything, and those are stupidly expensive. Moreover, when it comes to removing the interior rotor assembly from the outer casing, it says to “remove it” as if nothing special is needed. I hammered and wailed on that thing so hard that the spindle mushroomed. I set it aside for weeks because I wasn’t sure I would ever get it out. When I did, I saw the rust. That was all it took to make it nearly impossible to remove.
Moral of the story? This is not an alternator I would want to rebuild. It’s not worth it. If you need a new alternator, just buy new or factory rebuilt from the appropriate company (Toyota/Denso in my case). I won’t say there aren’t alternators out there that are easy to rebuild, but I would never attempt to do so without first buying a junkyard unit to test whether it’s possible. Unless you’re fine with spending money to learn, it’s probably not worth learning the hard way.
Wheel Bearings
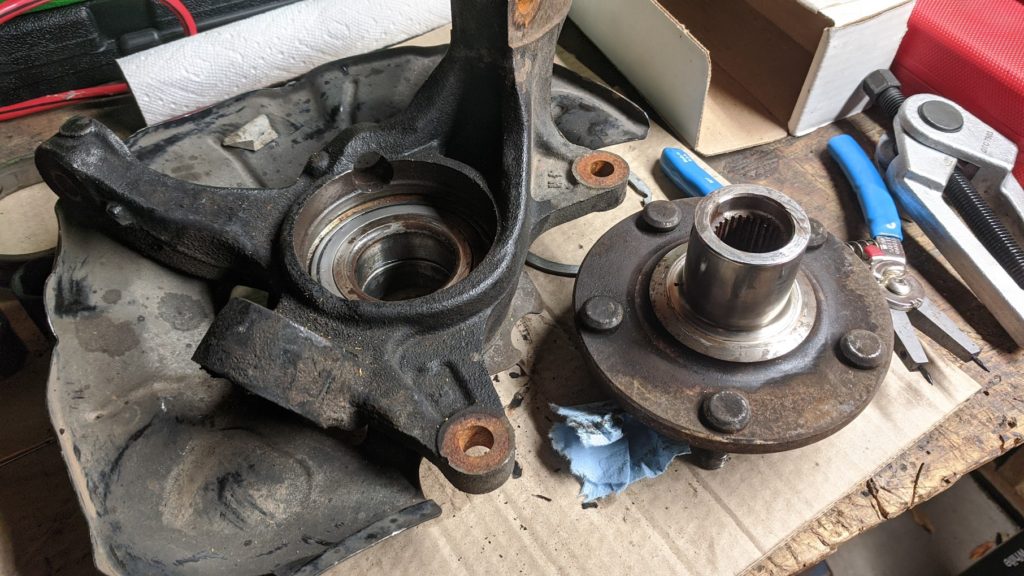
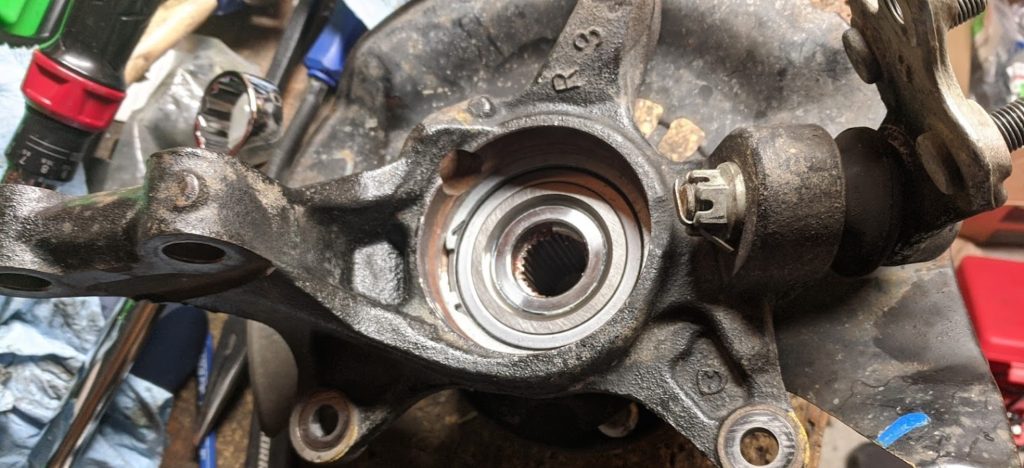
Finally, one year later, I got around to changing the wheel bearings, just a few weeks ago.
I managed to put the car up on jack stands and drop the passenger side knuckle in roughly 30 minutes. Mind you, a good professional can drop certain transmissions in 45 minutes, but 30 minutes for a knuckle is still a big deal for me: I’m quite pleased with myself being capable of that.
Back in January, I did something I’m really, really glad I did: I ordered new snap rings and dust shields for the bearings. While the junkyard knuckle’s dust shield came off without a hitch, I knew there was no guarantee that would happen on my car’s knuckles, and I didn’t want to worry about it, so I ordered those new. Well, when I finally got around to this project, sure enough, those dust shields did not want to come out, and I practically had to destroy them. But I didn’t have to care. Why? Because I planned ahead. And because of that, this project largely went off without a hitch.
Dust shield out. Snap ring out. Hub out. Bearing out. Clean. Bearing in. Snap ring in. Hub in. Dust shield in. Reinstall.
Each side took me roughly 5 hours total, all steps included. I’m not one to rush, but I’m not very experienced with the operation, either. Still, 5 hours is pretty good for a DIYer, and having something like the Hub Grappler made this relatively straightforward.
Worth noting is that the axle nut on the driver’s side slightly damaged the axle threads. I have no idea why this is now the second time that seems to have happened on that side, as the axle and nut are new, but the damage was only slight this time. Amazingly, that “large size” tap and die kit I bought many years ago came to the rescue, as one of those dies fit the axle itself and I was able to chase the threads and correct the parts that were slightly damaged. Because of that, the new axle nut went on cleanly. It doesn’t hurt to have some emergency tools like that. It took me maybe 15-30 minutes to careful clean and turned what could have been really stressful into a non-issue.
Final Notes
I did a few other things – brake pads and rotors, some vacuum hoses. Did some inspections of the rear suspension. Oh, I did change one of the strut assemblies again, because it was making knocking sounds over bumps and creaks on slow turns (stupid aftermarket parts!!!).
Why do all this? Why put so much into an older car?
Partly, I don’t like ignoring things when I know they need to be fixed, so if I see that bushings are cracking, or hoses are stiff, or parts are making noises they shouldn’t make, or seals are leaking, I want to fix those.
The transmission is a slightly different story, since fixing that leak isn’t as easy as, say, an $80 power steering hose. It’s not something I’m avoiding out of laziness, it’s something I’m avoiding out of economy. I could attempt it myself, which would push my skills to the next level (or result in catastrophic destruction), but simply opening the transmission carries some risk that is otherwise mitigated by simply monitoring the fluid level and not worrying about it. Even paying a professional doesn’t mean that something might not get botched in the process. I’m choosing not to worry about it for the time being.
Also partly, I kind of love this stuff. I love making something “new” and whole. I love when a job turns out perfectly. It feels good. I also love learning, and pushing my boundaries, and accomplishing at that level. I’m not a very competitive person, but I love raising the bar as far as my own interests go. Ever since I learned I was mechanically inclined and had good aptitude in that direction, I’ve tried to embrace it. Especially this past year, I’ve really felt encouraged to engage in learning those things I want to learn, so I keep pushing myself with automotive stuff because it is super useful. Every job that I’m able to successfully complete on a car is that much more resiliency built into my long-term goals.
As far as the economics of all this work goes, well….that’s a post for another day. I’ve had to change some of my opinions over time, and I’m learning that saving money shouldn’t necessarily be the primary focus, if you have that luxury. I have a lot to say about that, and a lot of thoughts I want to share. And that Hub Grappler, man…I’ve got some thoughts on that.